
Lever Seated Dip
The Lever Seated Dip is an effective isolation exercise that targets the triceps, chest, and shoulders. This machine-based movement mimics the bodyweight dip but provides more control and allows you to focus on the muscle contraction without the need for balance. It is a great option for those looking to build upper body strength, especially in the triceps, while reducing stress on the wrists and shoulders compared to other dip variations.
The Lever Seated Dip is performed on a seated dip machine, which uses a lever mechanism to create resistance. The machine allows you to adjust the weight easily and provides stability, making it accessible to beginners and advanced lifters alike. The seated position removes some of the balance and core requirements of traditional dips, allowing you to focus solely on the pressing movement.
Targeted Muscle Groups
Primary Muscles:
- Triceps Brachii: The triceps, consisting of the long, medial, and lateral heads, are the main muscles worked during this exercise. The pushing movement of the seated dip places constant tension on the triceps, helping to build strength and muscle mass.
Secondary Muscles:
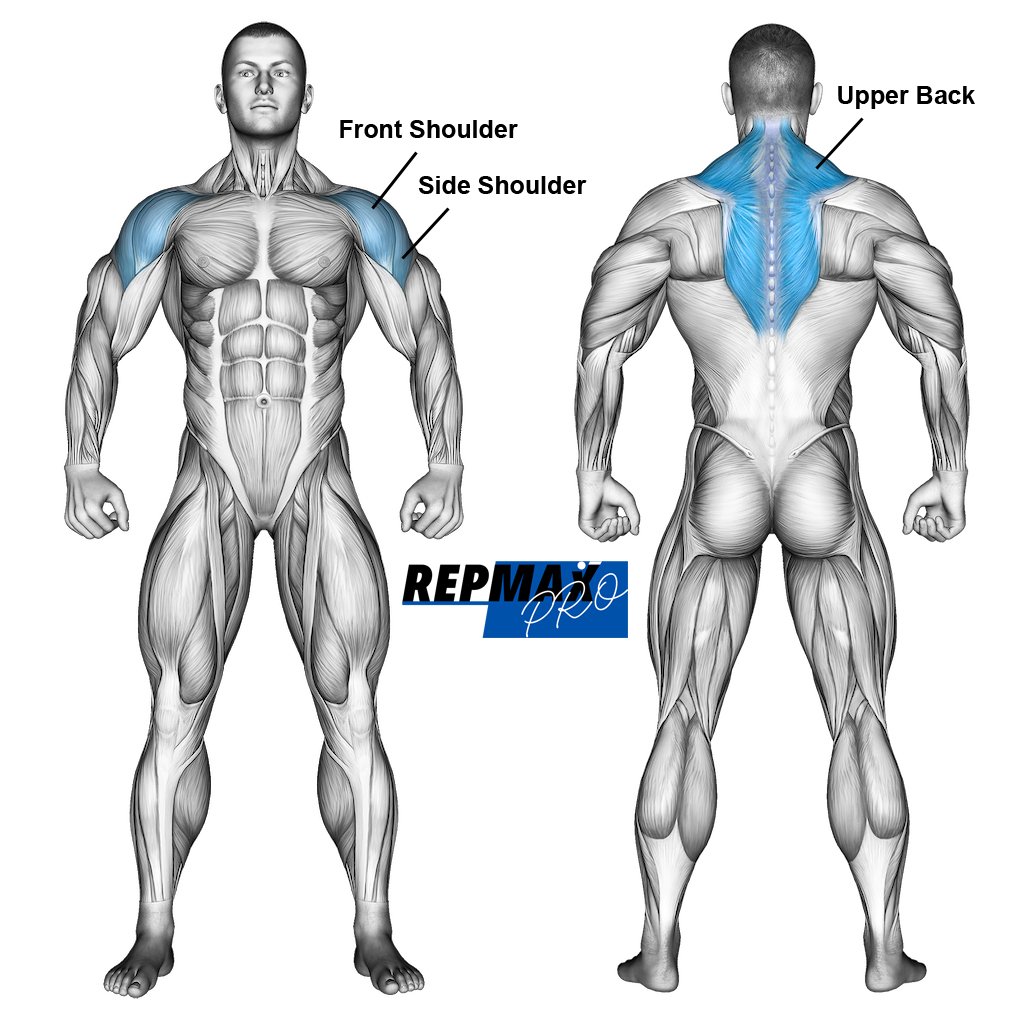
- Pectoralis Major (Chest): The chest muscles, specifically the lower pectorals, are engaged to a lesser extent during the pressing phase.
- Anterior Deltoids (Shoulders): The front part of the shoulders also assists in the movement.
- Core and Stabilizers: The core muscles are activated to maintain a stable position during the movement.
Equipment Needed
- Seated Dip Machine: This is a specialized piece of gym equipment that features a lever system, allowing you to adjust the resistance based on your strength level. It typically includes padded handles, an adjustable seat, and a weight stack or plates for added resistance.
How to Perform the Lever Seated Dip: Step-by-Step Guide
Step 1: Setup
- Adjust the seat height so that when you sit down, your elbows are at a 90-degree angle when holding the handles.
- Select your desired weight on the machine by adjusting the pin in the weight stack or loading plates onto the machine.
- Sit on the machine and grasp the handles with an overhand grip, keeping your hands slightly wider than shoulder-width apart.
Muscles used in the military press.
Illustration credit © Aliaksandr Makatserchyk
Step 2: Starting Position
- Sit with your feet flat on the ground and your back pressed against the seat.
- Keep your chest lifted, and engage your core muscles to stabilize your torso.
- Your upper arms should be parallel to the ground with elbows bent at about 90 degrees.
Step 3: Execution
- Concentric Phase: Exhale as you press the handles down by straightening your arms. Push until your arms are fully extended, but avoid locking out your elbows.
- End Position: Once your arms are fully extended, hold the position briefly and squeeze your triceps.
- Eccentric Phase: Inhale as you slowly allow the handles to rise back to the starting position, bending your elbows and maintaining control of the weight.
Step 4: Repeat
- Continue the movement for the desired number of repetitions while maintaining control and proper form.
Recommended Reps and Sets
- Beginners: 3 sets of 10-12 reps with moderate weight
- Intermediate: 4 sets of 12-15 reps with challenging weight
- Advanced: 4-5 sets of 15-20 reps, focusing on time under tension to maximize triceps engagement
Pro Tips for Success
- Control the Movement: Avoid using momentum. Focus on slow and controlled movements to ensure that the triceps remain the primary muscle being worked.
- Mind the Range of Motion: Make sure to fully extend your arms at the bottom of the movement without locking out your elbows. At the top of the movement, stop just before your elbows are at 90 degrees to keep tension on the triceps.
- Breathe Correctly: Inhale during the lowering phase (eccentric) and exhale during the pressing phase (concentric) for better control and muscle activation.
- Adjust the Seat Height Properly: Ensuring the correct seat height is crucial to avoid unnecessary strain on your shoulders and wrists. Your elbows should be at a 90-degree angle when you begin the exercise.
Common Mistakes to Avoid
- Using Too Much Weight: Lifting more than you can handle often results in poor form, such as using your chest and shoulders excessively to assist in the movement. Start with lighter weights and gradually increase as your strength improves.
- Inadequate Range of Motion: Avoid cutting the range of motion short. Failing to fully extend your arms at the bottom of the movement or bending your elbows enough at the top can reduce the effectiveness of the exercise.
- Rushing the Movement: Many people tend to rush through the reps, especially on the negative (eccentric) phase. Slow down and focus on controlling the descent to maximize muscle engagement.
- Elbow Flare: Allowing your elbows to flare out to the sides can place unnecessary strain on your shoulders and reduce the isolation of the triceps. Keep your elbows tucked in throughout the exercise.
The Lever Seated Dip is an excellent exercise for building strong and defined triceps while also engaging the chest and shoulders. It’s a machine-based movement, making it accessible to all fitness levels and providing a safe, controlled environment to work on strength and form. By keeping the movement controlled, using proper technique, and avoiding common mistakes, you can effectively target your triceps and build upper body strength. Incorporate this exercise into your routine to develop bigger, stronger arms and improve your overall pushing power.