
Assisted Triceps Dip (Kneeling)
The Assisted Triceps Dip (Kneeling) is an excellent exercise for building upper body strength, particularly in the triceps, chest, and shoulders. By utilizing assistance, typically through a machine or resistance bands, this variation of the triceps dip allows individuals of all fitness levels to perform the exercise with controlled intensity, reducing the risk of injury while building foundational strength.
The kneeling position lowers the body and provides more stability, making this variation more accessible for beginners or those recovering from injuries. It’s an ideal exercise for improving overall pressing strength and preparing for more advanced bodyweight movements like unassisted dips or push-ups.
Targeted Muscle Groups
Primary Muscles:
- Triceps: The triceps are the primary muscles activated during the pushing motion of the dip. This muscle, located at the back of the upper arm, is responsible for elbow extension.
Secondary Muscles:
- Pectorals (Chest): The chest muscles are engaged as secondary movers during the dip, contributing to pressing power and providing additional stability.
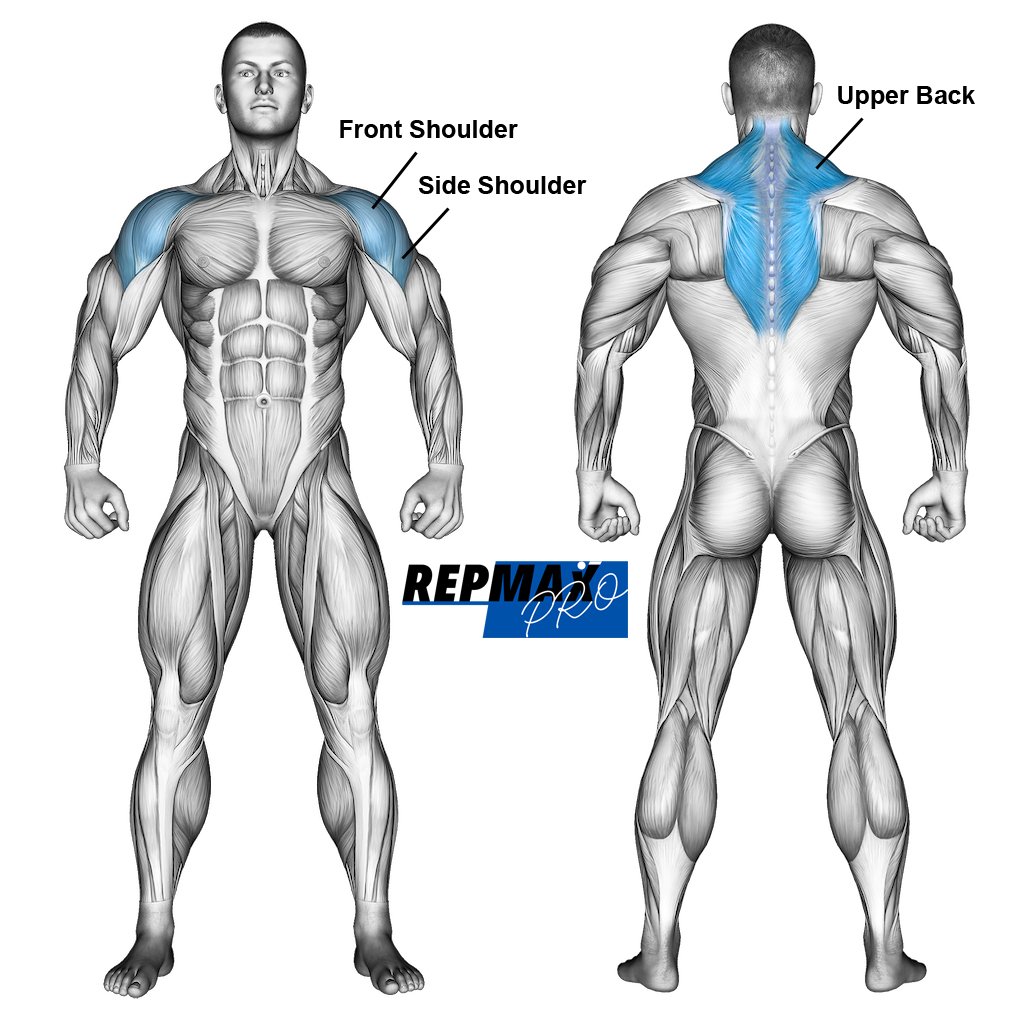
- Deltoids (Shoulders): The anterior deltoids assist in the upward pressing motion, helping stabilize the arms and shoulders.
- Core (Abdominals and Lower Back): The core muscles play a role in maintaining balance and posture throughout the movement.
Equipment Needed
- Assisted Dip Machine (Preferred): This machine allows users to adjust the weight assistance, making the exercise easier or harder depending on strength levels.
- Resistance Bands (Alternative): Looping resistance bands over parallel bars provides an affordable alternative for performing assisted dips.
- Parallel Bars: Whether on a machine or using resistance bands, parallel bars are necessary to perform this exercise.
How to Do the Assisted Triceps Dip (Kneeling): Step-by-Step Guide
Step 1: Setup
- Using a Dip Machine: Adjust the machine to your desired assistance level. The more weight you select, the easier the exercise will be. Kneel on the support pad and grasp the parallel bars with your hands shoulder-width apart.
- Using Resistance Bands: Loop a resistance band securely around the parallel bars. Place your knees in the band while gripping the bars.
Muscles used in the military press.
Illustration credit © Aliaksandr Makatserchyk
Step 2: Starting Position
- Begin with your arms fully extended, supporting your body weight with the assistance of the machine or band.
- Your knees should be resting on the support platform or in the resistance band, keeping your torso upright and your core engaged.
Step 3: Execution
- Concentric Phase (Lowering): Slowly lower your body by bending your elbows. Keep your torso upright and your elbows pointing backward. Lower yourself until your upper arms are roughly parallel to the ground, or just below a 90-degree angle at the elbow.
- End Position: In the bottom position, your triceps should feel stretched, and your shoulders slightly engaged without collapsing.
- Eccentric Phase (Lifting): Press through your hands, extending your elbows to return to the starting position with your arms fully extended.
Step 4: Repeat
- Perform the desired number of repetitions, maintaining control and tension on the triceps throughout the movement.
Recommended Reps and Sets
- Beginners: 2-3 sets of 8-10 reps with moderate assistance
- Intermediate: 3-4 sets of 10-12 reps with reduced assistance
- Advanced: 4 sets of 12-15 reps with minimal assistance or none, focusing on controlled movement
Pro Tips for Success
- Control Your Movement: Focus on performing slow, controlled repetitions. This ensures your muscles are engaged throughout the entire movement, leading to better muscle activation and reducing the risk of injury.
- Adjust Assistance Gradually: Over time, decrease the amount of assistance to challenge your triceps further and build more strength.
- Focus on Elbow Position: Keep your elbows close to your body to target the triceps more effectively. Flaring your elbows outward can shift the emphasis away from the triceps and place more strain on the shoulders.
- Engage Your Core: To maintain proper posture and avoid swinging, engage your core throughout the exercise.
- Full Range of Motion: Lower yourself as far as your shoulder mobility allows, but don’t overextend to the point of discomfort. A full range of motion maximizes muscle engagement and effectiveness.
Common Mistakes to Avoid
- Relying Too Much on Assistance: While it’s tempting to use excessive assistance, doing so reduces the effectiveness of the exercise. As your strength improves, gradually reduce assistance to continue progressing.
- Not Going Low Enough: Failing to lower yourself sufficiently during the dip reduces muscle activation. Aim to lower your body until your upper arms are parallel to the ground.
- Leaning Too Far Forward: Leaning too far forward during the dip places more emphasis on the chest and shoulders. Keep an upright torso to focus on the triceps.
- Rushing Through Reps: Speeding through the reps minimizes time under tension. Slow and controlled movements lead to better results and reduce the risk of injury.
The Assisted Triceps Dip (Kneeling) is an excellent exercise for building triceps strength while minimizing strain on the shoulders and wrists. It’s perfect for beginners or those looking to increase strength progressively, as the assistance allows for proper form without overloading the muscles.
By focusing on controlled movement, proper elbow positioning, and gradually reducing assistance, you can maximize the effectiveness of this exercise and build the foundational strength needed for unassisted dips. Incorporating the kneeling-assisted triceps dip into your workout routine will help you develop stronger arms, improve pressing strength, and build muscle definition over time.